Guest Feedback Embed
Overview
Our privacy focused guest feedback embed widget allows you to collect user feedback from any user of your site. Within your Bugflow project, you can set up which one of your integrations receives the guest feedback allowing your team to respond directly from the tool of their choice.
The guest feedback widget is built with privacy in mind. There are no cookies, no tracked data besides what is provided by the user, and no tracking pixels. We don't even know who your users are unless they tell us. This ensures the integrity of your app.
Difference from Browser Extensions
So when do you use the browser extension vs the guest feedback widget? The browser extension is great for internal testing and development and for users who have access to your projects where the guest feedback widget is great for collecting feedback from anonymous users. The browser extensions are way more powerful, and bring in the power of bug tracking tool right to your app.
You can use both simultaneously! If the browser extension detects the guest widget, the browser extension will be used. That means you have the power of an authenticated user when needed.
Enabling Guest Feedback
All you have to do is navigate to your individual project within the web app, click the "Guest Reporting" link on the sidebar and toggle the "Enable Guest Reporting" switch.
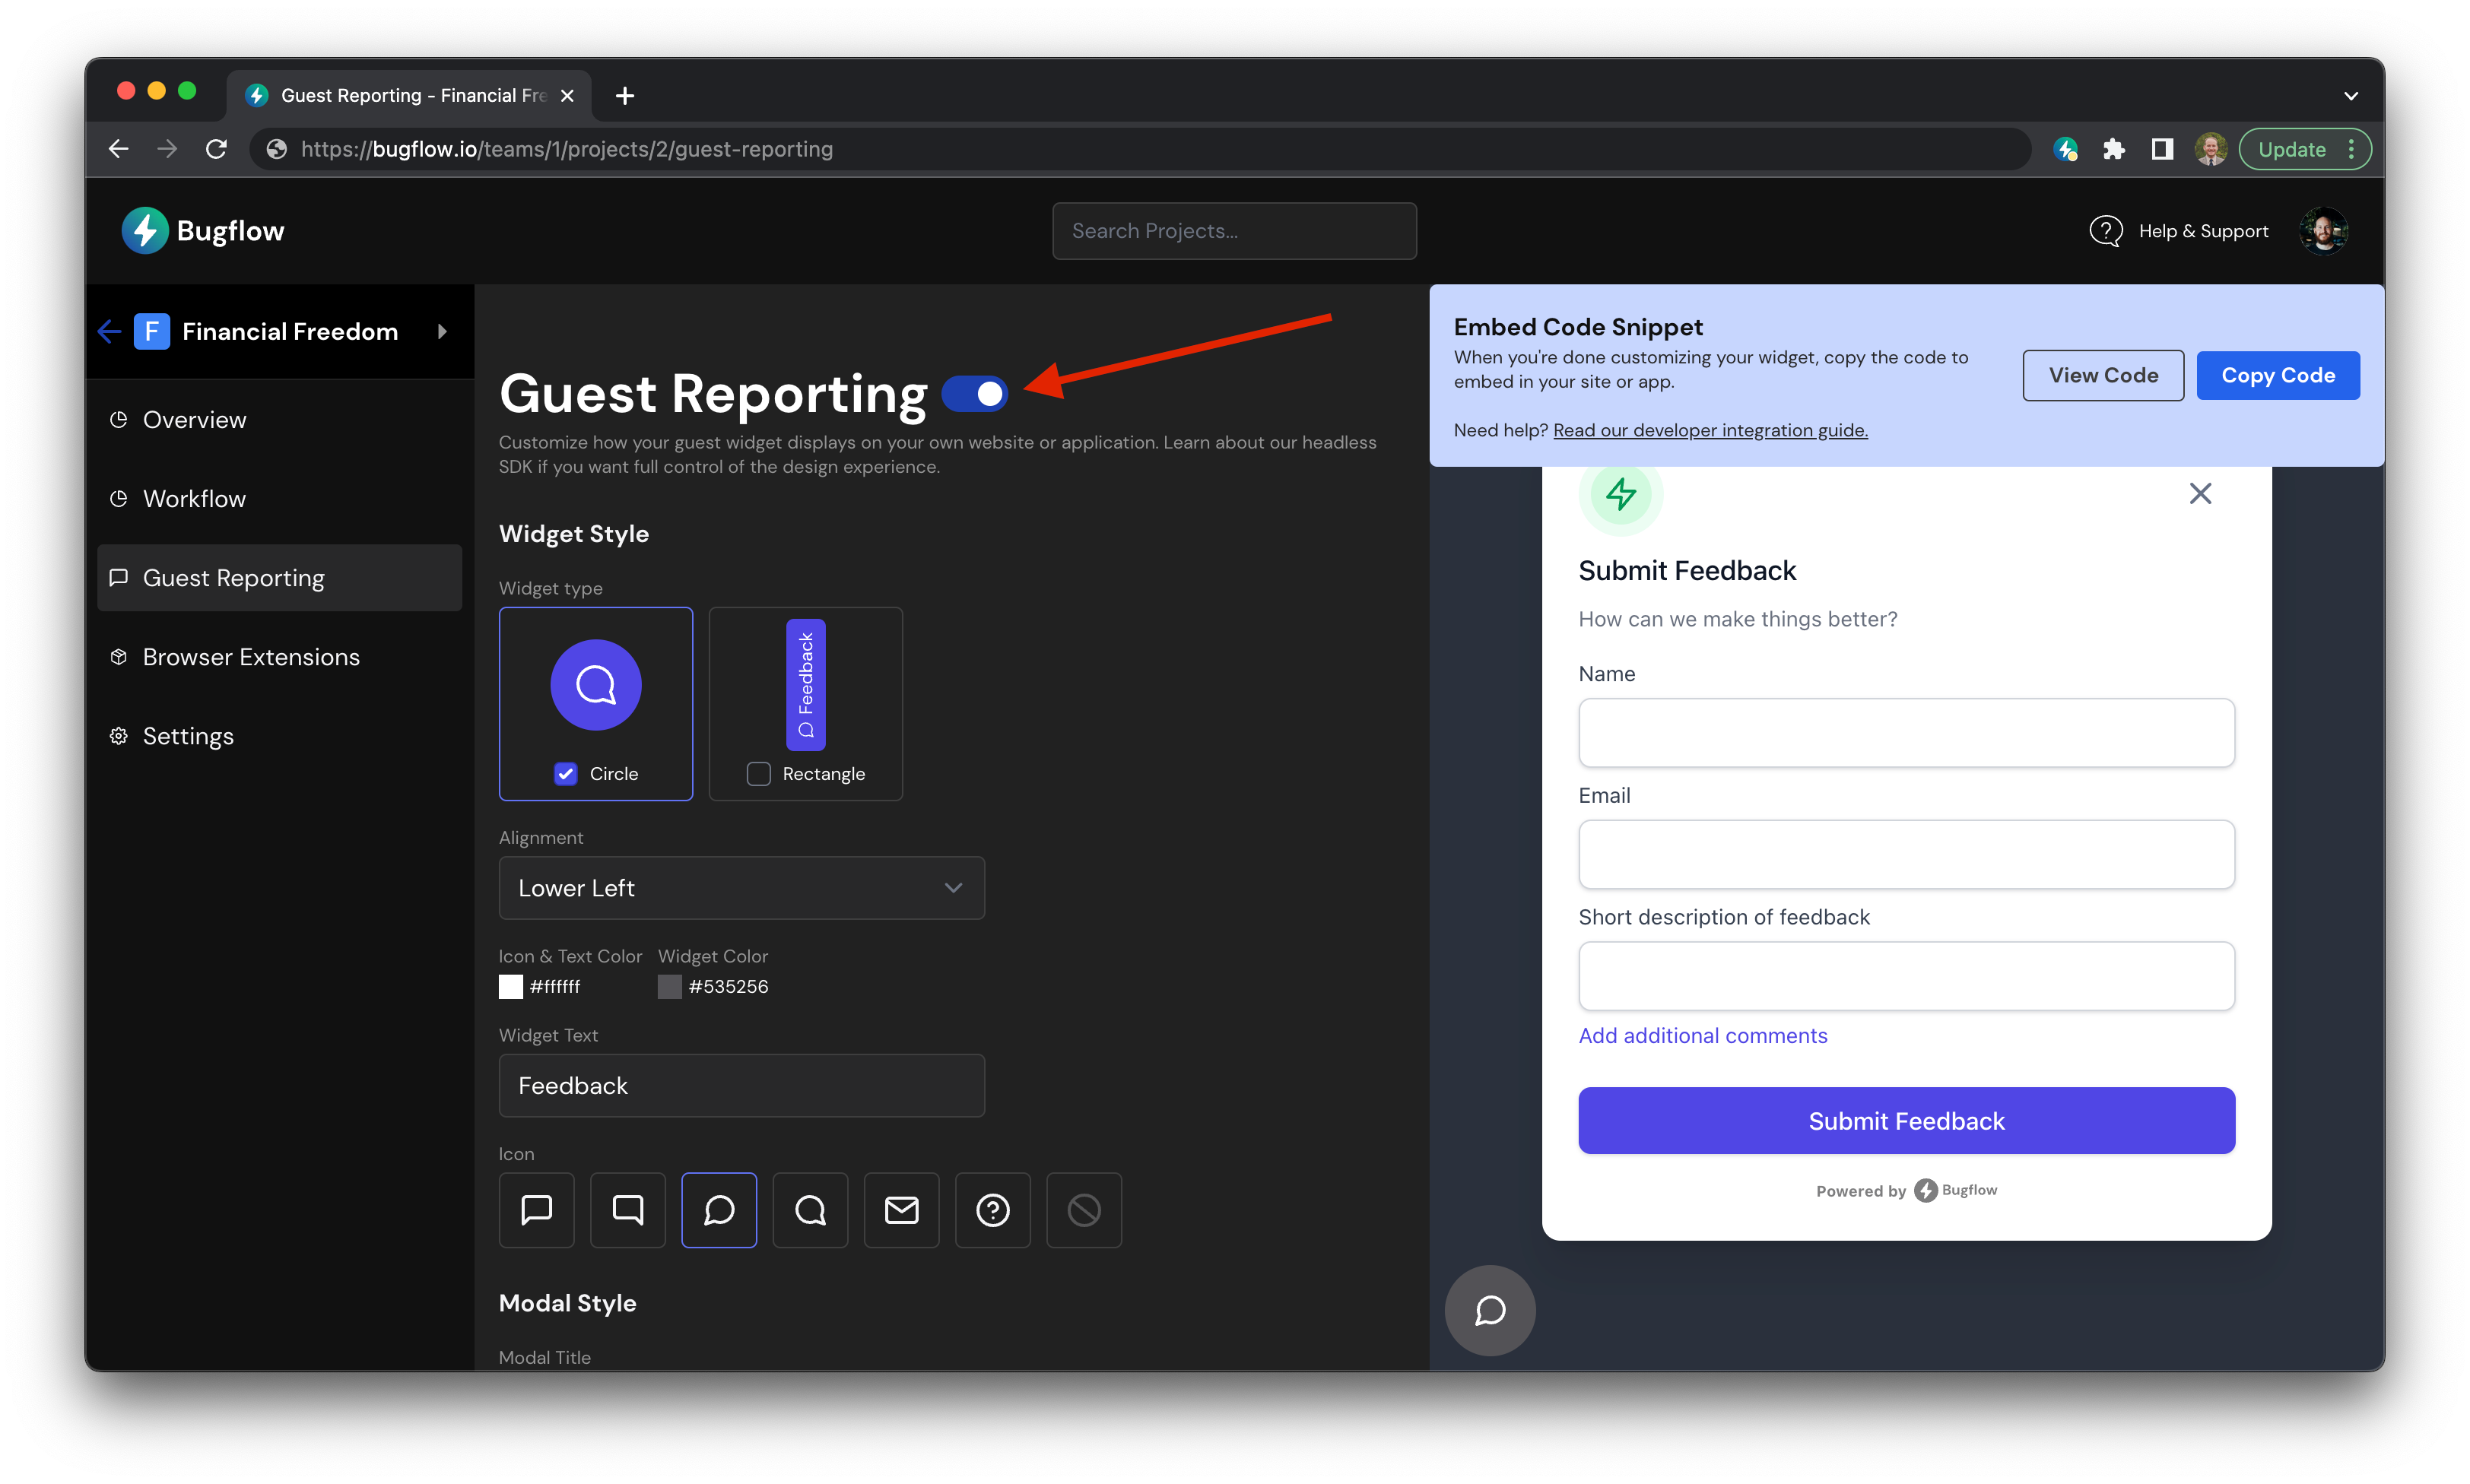
Guest reporting is now enabled on your project. Once enabled, you can use our handy tool to design your embed to match your branding and colors of your site, copy the code, and you are ready to go!
Installing the Guest Feedback Widget
The recommended way to install the guest feedback widget is to add the script tag to your html with the async property. This will ensure that the widget does not block the loading of your site. By loading from the CDN you will also have access to the latest version of the widget without having to update your code.
<script async src="https://cdn.bugflow.io/embed.js"></script>
The next step is to initialize Bugflow. Minimally, you have to pass the key of your project.
<script>
Bugflow.init({
    key: 'XXX-XXX-XXX'
});
</script>
You can also pass in any of the other settings to customize the look and feel of the widget (see below).
Designing your Embed
The quickest way to design your embed is to visit the "Guest Reporting" section of your project within app.bugflow.io. You can then use our handy tool to design your embed to match your branding and colors of your site, copy the code, and you are ready to go!
We also allow you to set all customizations on initialization through the config variable accepted by the init() method. Below are all of the available config variables and their default values.
Config
Below are all the available config variables, their default values and available options.
| Key | Description | Default Value |
|---|---|---|
| key* | Your project's unique key | |
| widget_style | How you want your widget to be displayed | circle |
| alignment | Determines where you want your widget to be displayed | lower-right |
| icon_text_color | Color of the icon and text (rectangle widget only) in the widget | #ffffff |
| widget_color | Background color of the widget | #4F46E5 |
| widget_text | Text displayed on the widget (rectangle widget only) | "Feedback" |
| icon | Icon you want displayed on the widget | message-circle-right |
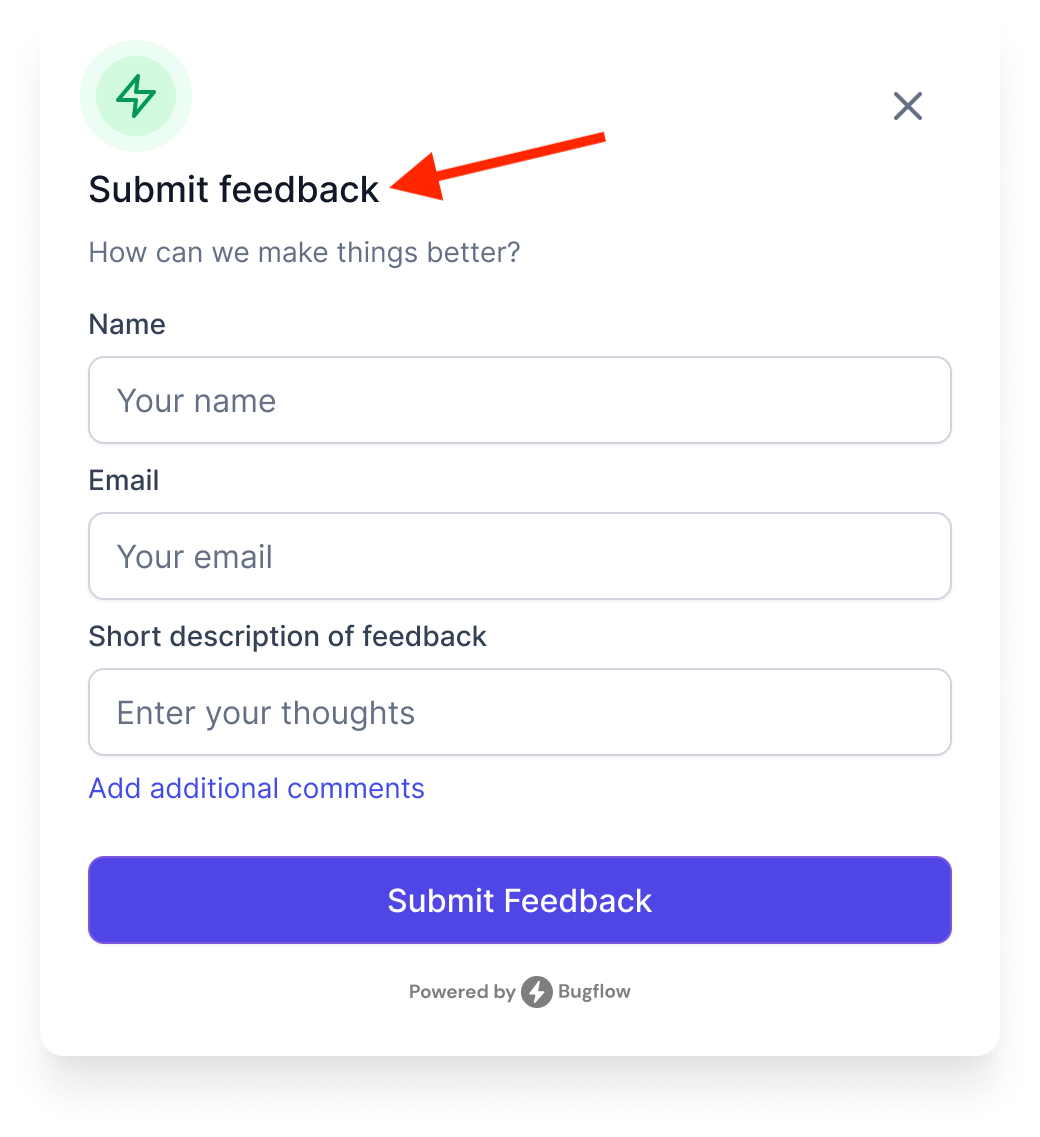
| modal_title | Title of the modal when submitting feedback | "Submit Feedback" |
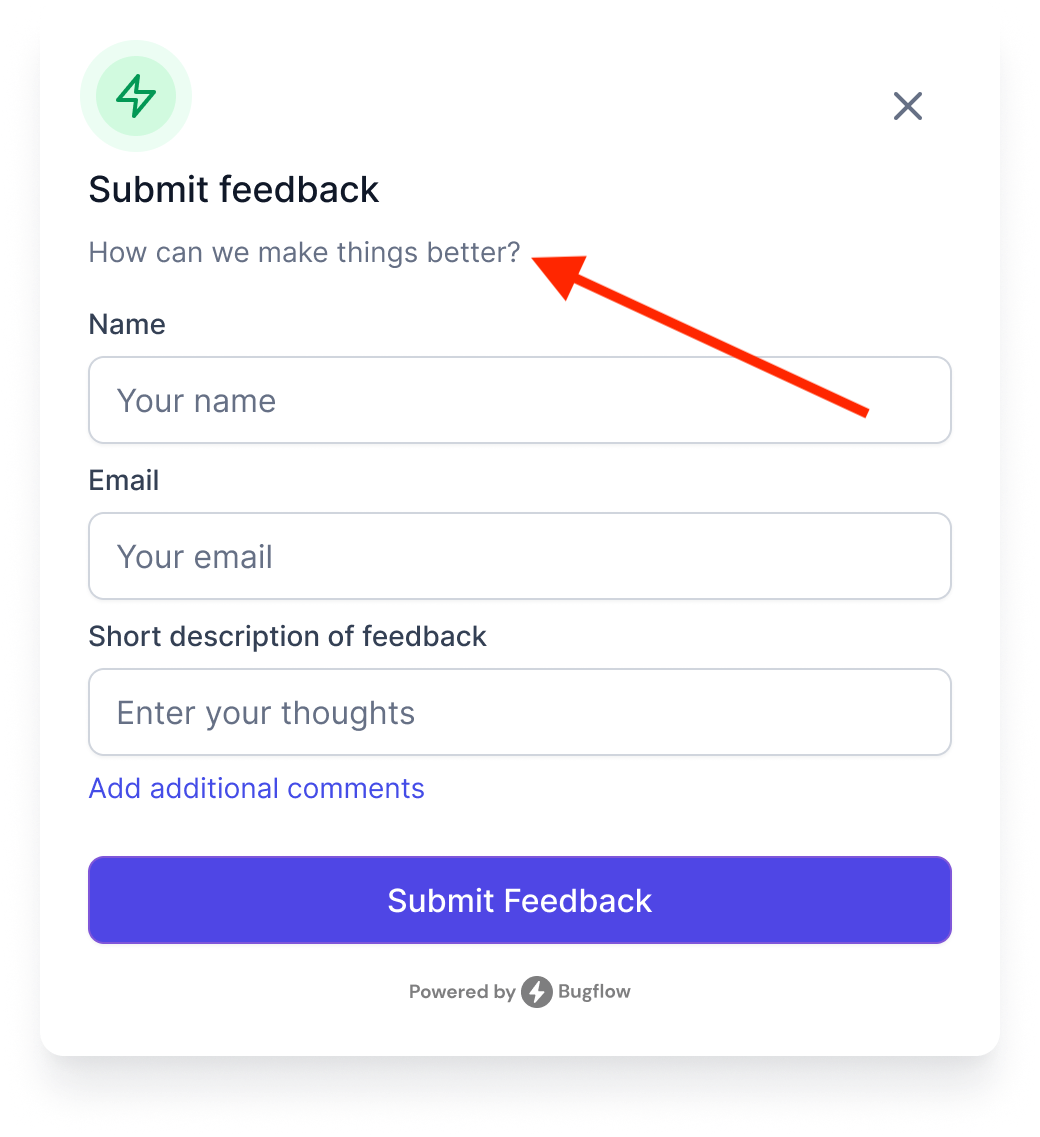
| secondary_text | Sub title on the modal when submitting feedback | "How can we make things better?" |
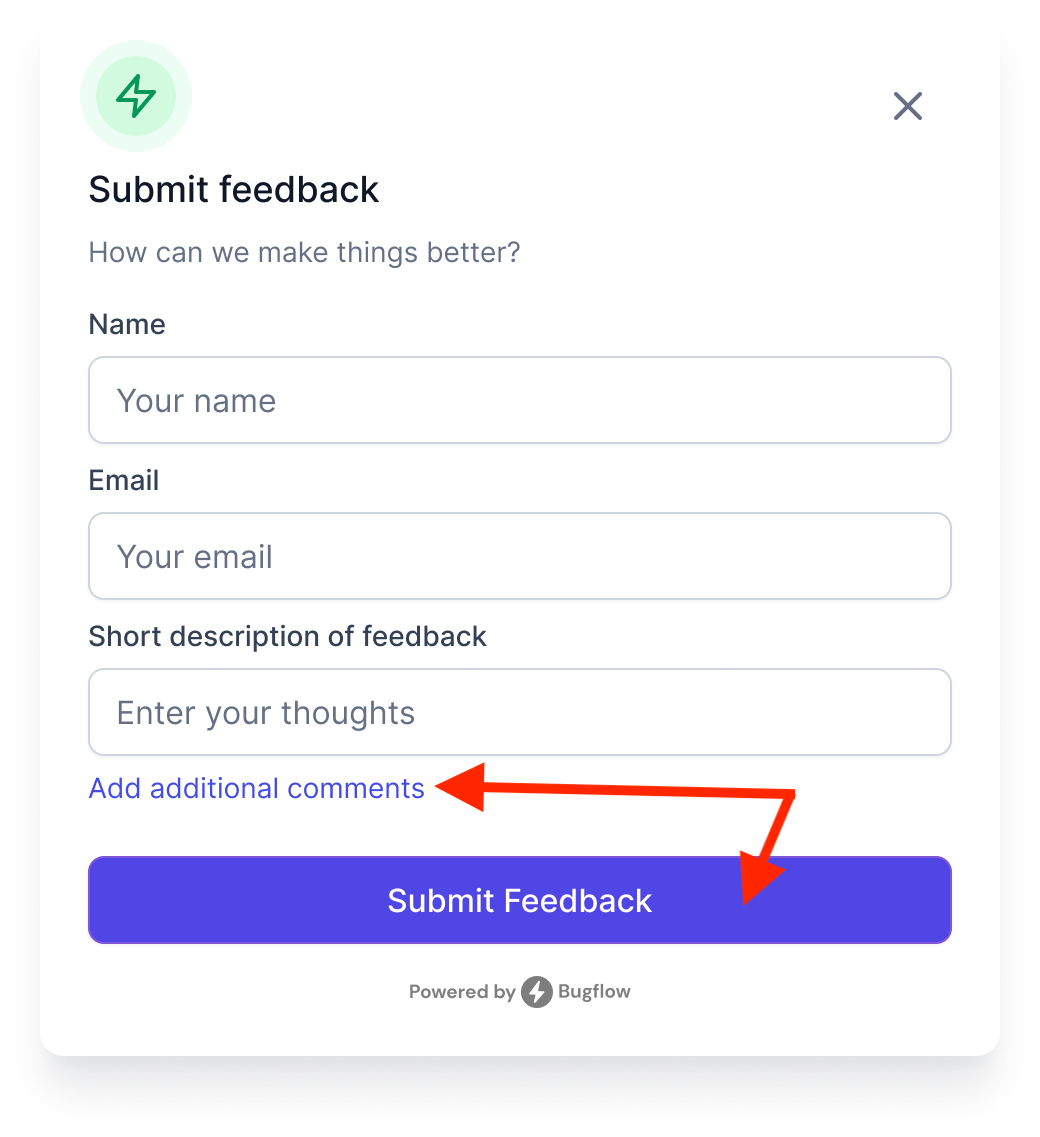
| button_color | Color of the buttons on the modal | #4F46E5 |
| show_widget | Turn the widget on or off (can trigger reporting through an available method) | true |
<script>
Bugflow.init({
    key: 'XXX-XXX-XXX',
    widget_style: 'circle',
    alignment: 'lower-right',
    icon_text_color: '#ffffff',
    widget_color: '#4F46E5',
    widget_text: 'Feedback',
    icon: 'message-circle-right',
    modal_title: 'Submit Feedback',
    secondary_text: 'How can we make things better?',
    button_color: '#4F46E5',
    show_widget: true
});
</script>
key (required)
Your project's unique key. You can find this on the "Guest Reporting" section of your project within app.bugflow.io.
widget_style
| Options | Description |
|---|---|
circle (default) | A circle widget with an icon in the center |
rectangle | A rectangle widget with a small icon and customizable text |
When using the rectangle style you can also set the widget_text which will display on the widget. The icon_text_color will affect both the icon and the text on the widget as well.
Circle

Rectangle

alignment
| Options | Description |
|---|---|
lower-right (default) | Positions the widget in the lower right section of the screen. |
lower-left | Positions the widget in the lower left section of the screen. |
middle-right | Positions the widget in the middle of the screen on the right hand side (rectangle widget will rotate accordingly) |
middle-left | Positions the widget in the middle of the screen on the left hand side (rectangle widget will rotate accordingly) |
icon_text_color
Accepts any hex color code. This will affect both the icon and the text (rectangle only) on the widget.
widget_color
Accepts any hex color code. This will affect the background color of the widget.
widget_text (rectangle only)
When displaying a rectangle widget, you can set the text that will display on the widget.
icon
For both the circle and rectangle widget, you can set the icon that will display on the widget. Below are all the available icons.
| Options | Description |
|---|---|
message-circle-right (default) | Circular chat bubble pointing right |
message-circle-left | Circular chat bubble pointing left |
message-square-right | Square chat bubble pointing right |
message-square-left | Square chat bubble pointing left |
mail | Mail icon |
help | Help icon |
Message Circle Right

Message Circle Left

Message Square Right

Message Square Left


Help

modal_title
Accepts a string value to set as the title of the guest reporting modal.
secondary_text
Accepts a string value to set as the sub title of the guest reporting modal.
button_color
Accepts any hex color code. This will affect the background color of the buttons on the guest reporting modal.
show_widget
This is a boolean value that will determine if the widget is displayed on the page. If set to false, you can still trigger the guest reporting modal through the Bugflow.recordBug() method.
Functions
You can easily call methods that integrate with the guest widget through the Bugflow object. This allows you to take control of how your users can submit feedback and bugs. If you log into the Bugflow app, you may notice that the guest widget is not displayed. This is because we have disabled it and are using the Bugflow.recordBug() method to trigger the guest reporting modal.
Bugflow.init()
This is the main method to initialize the guest widget. Its only parameter is an object that accepts all the overrides listed above.
<script>
Bugflow.init({
    key: 'XXX-XXX-XXX',
    widget_style: 'circle',
    alignment: 'lower-right',
    icon_text_color: '#ffffff',
    widget_color: '#4F46E5',
    widget_text: 'Feedback',
    icon: 'message-circle-right',
    modal_title: 'Submit Feedback',
    secondary_text: 'How can we make things better?',
    button_color: '#4F46E5',
    show_widget: true
});
</script>
Bugflow.setKey()
If you didn't pass the key to the guest widget when initializing it, you can use this method to set it. The only parameter is the key of your project.
<script>
Bugflow.setKey('XXX-XXX-XXX');
</script>
Bugflow.recordBug()
This method prompts the recording of a Bug or feedback submission. Usually paired with hiding the widget, you can call this method to trigger the guest reporting modal from anywhere within your app.
<script>
Bugflow.recordBug();
</script>